Resize an image with Pixlr
This tutorial covers an easy way to crop and resize images, with no special software required. Do not use Cascade to resize your images.
After cropping, please compress your images before uploading to Cascade. Compression reduces the size of your photo files by getting rid of "extra" information.
- Go to Pixlr.com. Click "Open image" or simply drag and drop a file onto the page to upload a photo.

Start by clicking Open Image or dragging and dropping a file onto the home page. - If your image is quite large, you'll see a pop-up asking you to resize to prevent lag. Select the "Web" option on the right.
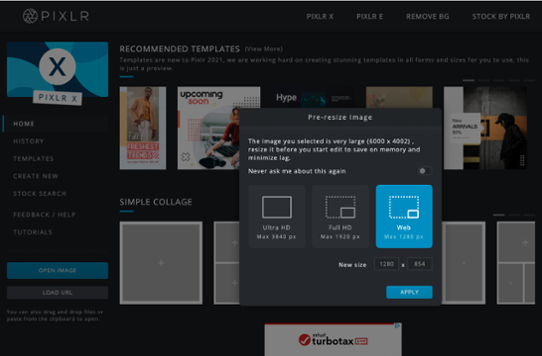
If you get a notification when you upload a file, select the "Web" option. - Click on the crop icon on the left hand menu (fifth from the bottom)

Select "Crop and Rotate" from the menu on the left - Click on the "Select aspect" dropdown option.
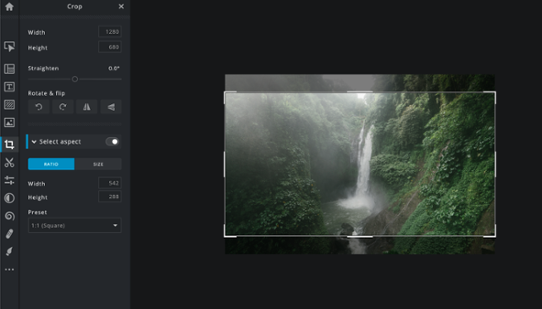
When you click on "Select aspect," you'll see a dropdown menu with more options - Type in your desired ratio. In this case we used 542 X 288.
- Adjust the pre-set box to crop the photo as desired.
- Press "Apply" in the bottom left, and then "Save" in the bottom right.
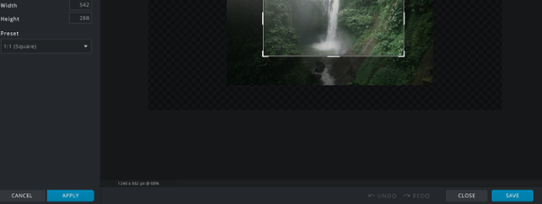
You'll find the "Apply" button in the bottom left and the "Save" button in the bottom right. - Enter a file name and select a file type. As a final step, you can type in the desired width and height again, which will change the image size (the previous steps changed the ratio, but the image may still be too large if you skip this step).

Finish up by naming your image, selecting a file type, and resizing - Press "Download."
Compressing image files
Compressing your image file helps it load faster. Often photo software adds hidden information to the file--like metadata--which can bloat the size of the file.
After cropping, please compress your images before uploading to Cascade. We recommend using TinyJPG, a free web-based tool that reduces the overall size of your image files without sacrificing image quality.
Tips
Always keep full-sized originals, you never know when you might need them!
Start the name of your cropped photo with the reference to what it will be used for:
- billboard-students-studying.jpg would go on your homepage
- main-fountain-summer.jpg would be for a picture on the other pages of your site
- profile-doe-jane.jpg would be for a profile page
