Create column boxes
To create column boxes:
- Click on Add Content at the top left of the window.

- Select UVic Blocks.

- In this example we will select 2 Column boxes. This block is conveniently set up with one row and two column boxes. To add additional column box rows, come to a drop-in session and we will show you how.

- Enter a System Name for your accordion.

- Leave the Display Name as is. It is a required field but doesn't actually display. You can also include a description if you wish (not required).

- Underneath Multi Column block you will see there is one Row provided. Be sure to leave the check mark beside Yes selected. (Note: If you were to deselect the Yes box, your column boxes would just appear as multi-column text, in which case you wouldn't necessarily need a title or image).

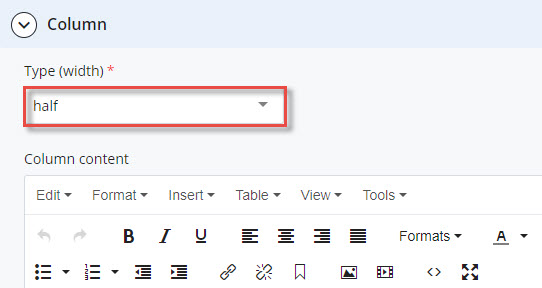
- You will see that each column box width is set to half.
- Change the first Column Title heading to your desired heading.

- Once you have changed the heading, be sure to hit enter on your keyboard and then click on the image icon in the WYSIWYG editor to locate and insert a column box sized image.

- Be sure to leave Internal selected and then click on Choose File.

- Then click on Browse to navigate and find an image in your assets folder.

- Once you have located the image, click on the radio button beside it to select.

- And then click on Choose.

- You will see that the image has been selected and the path is displayed. Be sure to include a short description of the image in the box beside Image description.

- Note: we recommend not adjusting the dimensions of the image within Cascade. It is best to size images properly before uploading them into Cascade.
- When you are finished, click OK.

- You will see that the image has been added to your column box. Hit enter on your keyboard and enter some text.

- Note: your column box headings and images should both link off to a page in your site.
- Scroll down to the second column box and enter the desired heading and follow previous steps above.
- When you have completed the second column box, click on the ellipsis and then click on submit.

- You will see that the column box has been saved under assets > blocks > multi-column.

- Now that your column box is created, you can add it to a page.
