University Systems help centre

Install Microsoft Defender for Endpoint (MSDE): Windows 10/11
Supported for in-support versions of Windows 10 and 11 only
These instructions are provided for self-managed computers and will require administrator access to complete. They are not for computers supported by Desktop Support Services.
Note: If you have any other Antivirus product installed on your computer, it will need to be removed before you can install Microsoft Defender for Endpoint.
1. Download the MSDE installer from here.
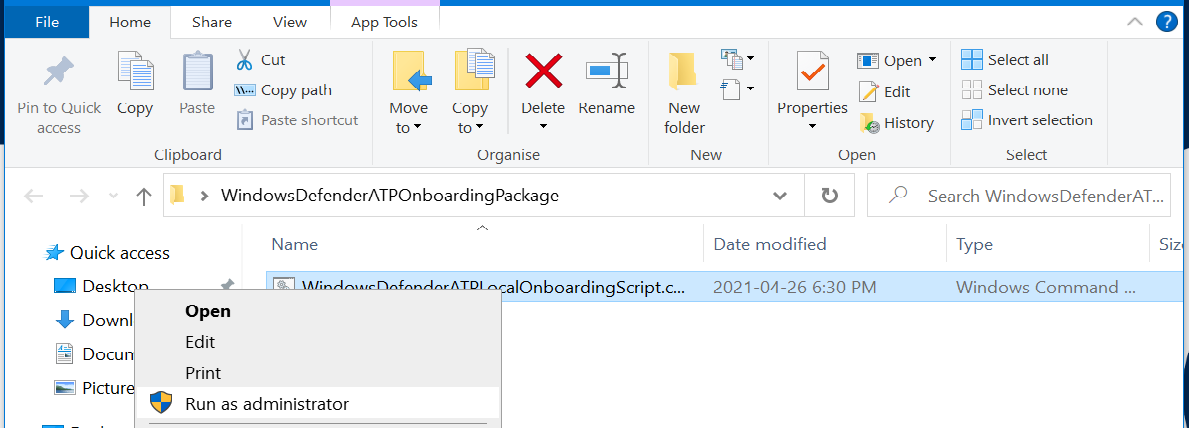
2. Double click the WindowsDefenderATPOnboardingScript.zip to extract the zip archive.

3. Right-click on the .cmd file and select Run as administrator:
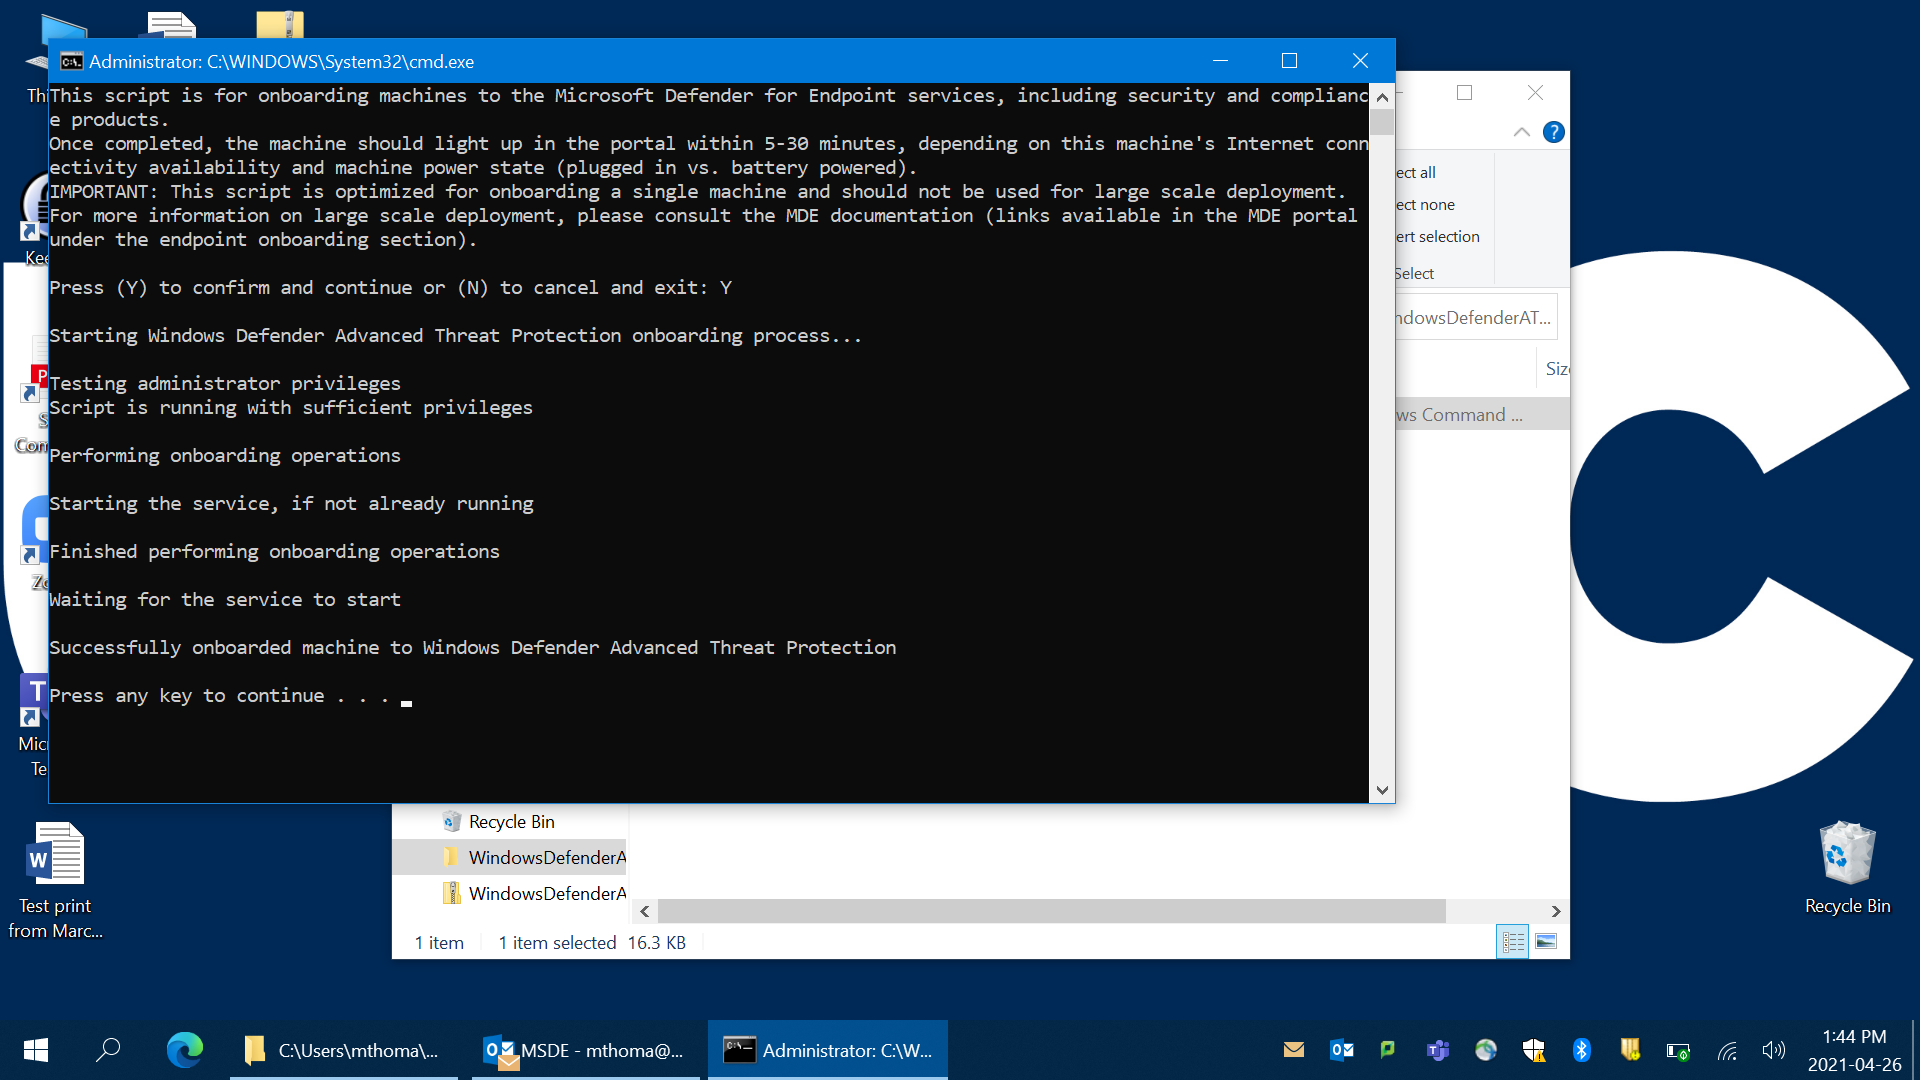
4. When prompted enter your administrator’s account name and password and you should see this window. Type Y and press return to install.

5. When the installation is complete, you should get confirmation that your computer is now onboarded to MSDE.
6. You will notice the MSDE shield icon in your tray (in the bottom-right corner of your screen).
![]()
7. Installation is complete. MSDE is configured to update automatically and without user intervention.
* Note: MSDE, Microsoft Defender for Endpoint is the same product as Microsoft Defender ATP