How to install Echo360 Capture for Mac
Please note: Echo360 Capture for Mac has a minimum system requirement of macOS 10.14 (Mojave) or higher.
If you are on a UVic Mac managed by Desktop Support Services (DSS), Echo360 Capture will be available for download in Jamf Self Service.
- Navigate to the Echo360 library in your Brightspace course (found under Course Tools) and select Create and then New Capture from the dropdown menu.

- You will be redirected to an Echo360 Universal Capture launch page where you can select Mac Download to begin downloading the installer.

- Once the installer has downloaded, double-click the installer and follow the Echo360 Universal Capture installation instructions.


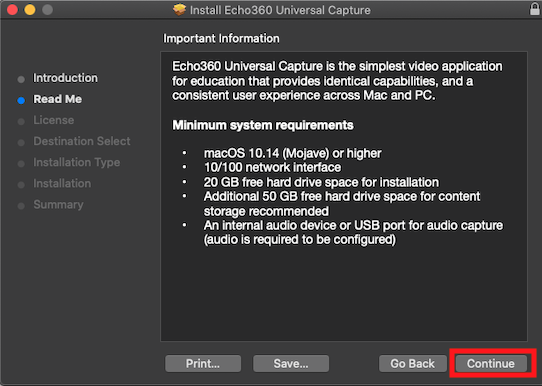
- Accept the license agreement and continue through the rest of the steps to complete the installation. Once the installation is complete, you can press ‘Close’ and move the Installer to the trash.


- You will be able to locate and launch Echo360 Universal Capture by selecting the Applications icon in the bottom-left of your screen and selecting the Echo360 Capture application.

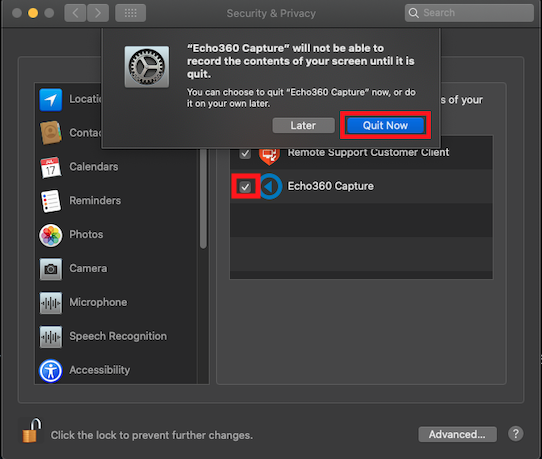
- Once Echo360 Universal Capture has launched, you will be prompted to open System Preferences to change your Security and Privacy Settings.

- Press the lock icon to make changes, enter your password, select/check the box for the ‘Echo360 Capture’ application and press ‘Quit now’ when prompted. After doing so, close the lock icon by clicking it once more to prevent further changes from being made.


- Now that your System Preferences have been configured, re-launch Echo360 Universal Capture by once again selecting the Applications icon in the bottom-left of your screen and selecting the Echo360 Capture application.
- Once Echo360 Universal Capture has launched, select 'Click here to login'. You may be redirected back to Brightspace or to UVic Single Sign On to sign in with your NetLink ID.

- If prompted, select Open Echo360 Capture.

- You will now be signed into Echo360 Universal Capture.

